
Scrapkit of choice. I used a PTU kit by DesignedByStina Called EveningSunset at purchased here
I used the artwork of Keith Garvey You have to be licensed to use this artwork and it can be purchased here
Plug-ins used:
Lokas Software - 3D Shadow
EyeCandy4000- gradient glow
photoeffex-scanlines
Anmations Shop
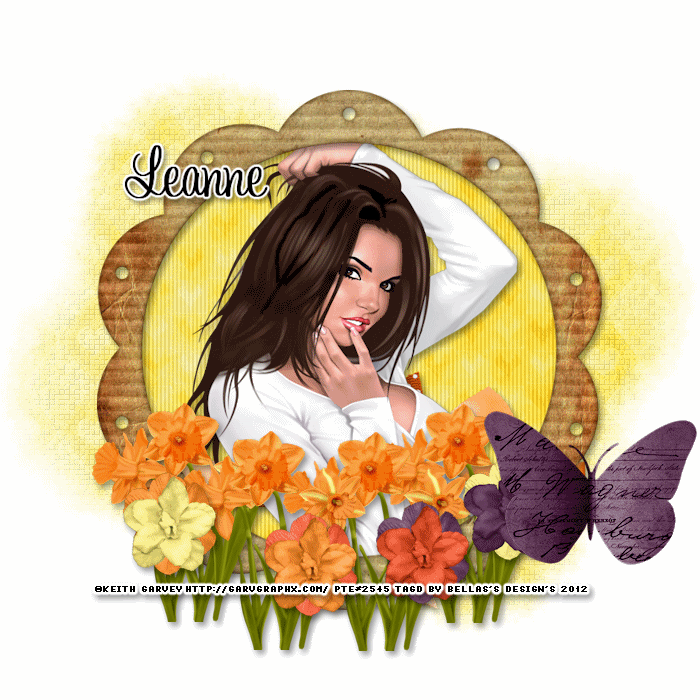
Open a new canvas 700x700 Transparent
1.Open up your DBS_Frame10 copy and paste as new layer resize 80%,take your magic wand click inside modify expand by 5 add new layer flood with DBS_Paper08,apply photoeffex-scanlines with these settings, 2,2,20,10,2,2 vertical toggle checked,
Give your frame layer Apply Lokas 3D Shadow with settings at B35, T60, Angles X,Y, and Z at 0, zoom 100, Offset X-Y by 5, Perspective at 35 color black
2.Open up your DBS_Wrap03 copy and paste as new layer resize 60% move down close to your bottom of your frame,Apply Lokas 3D Shadow with settings at B35, T60, Angles X,Y, and Z at 0, zoom 100, Offset X-Y by 5, Perspective at 35 color black
4.Open up your Tube Copy and paste as new layer resize 80% sharpen then duplicate then Gaussian Blur 2 then change blend mode to soft light.merge down, then changle blend mode to normal
5.Open up your DBS_Daffodils02 copy and paste as new layer resize 60% the Duplicates 4 times Merge down,Resize 50%, Duplicates Image Mirror,Apply Lokas 3D Shadow with settings at B35, T60, Angles X,Y, and Z at 0, zoom 100, Offset X-Y by 5, Perspective at 35 color black
6.Open up all your Flowers01,02,03,04 copy and paste as new layer resize 40%x2 Merge down,Apply Lokas 3D Shadow with settings at B35, T60, Angles X,Y, and Z at 0, zoom 100, Offset X-Y by 5, Perspective at 35 color black
7.Add your copyright info and your watermark/logo
8.I hope you enjoyed my tutorial and come visit again real soon!
9.Open Animation Shop Edit Paste As New Animation
10.Edit Duplicate Selected.Repeat Duplicate Selected 4 more times.You should have 17 frames
11.Go Back into PSP.Open DBS_PaperButterfly01.Image Resize.Resize by 60%x2, Smart Size, Resize all layers unchecked.Adjust Sharpness Sharpen.Edit Copy.
12.Back into Animation Shop.Edit Paste As New Animation
13.Effects Insert Image Effect, with these settings Animation Frame checked effects length:4.0secs,Frames per second 4fps Effects Compress
14.Edit > Select All.Edit Copy.On your main canvas Edit Select All.Edit Paste Into Selected Frame.Place the butterfly at the top of your image, or to your liking.
save and we're done
No comments:
Post a Comment